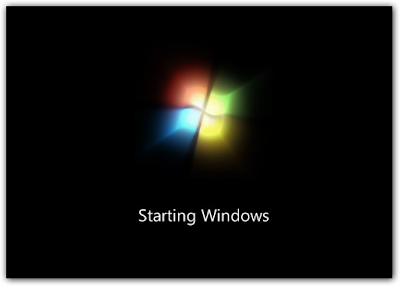
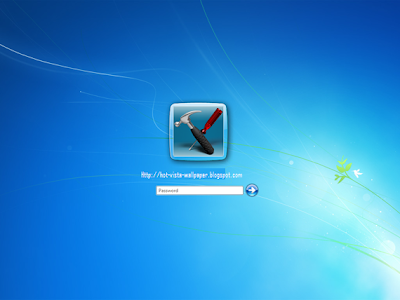
Windows 7 provides lots of new features along with a newly designed interface. It looks very similar to Windows Vista but there are many GUI changes like redesigned taskbar, Explorer, new boot screen and login screen, etc.
If you are still using Windows XP but want to enjoy the new Windows 7 look, then this tutorial will definitely help you.
After following this tutorial, you'll get the same Windows 7 look in your Windows XP. Following is a list of things which are going to change after following this tutorial:
* Windows Theme or Visual Style
* Icons
* Boot Screen
* Login Screen or Welcome Screen
* Cursors
* Taskbar
* Wallpaper
* Progress Dialog Box
* Shutdown / Log off Dialog Box
* About Windows Box
* System Properties Dialog Box
* Volume Control Window
* Extras like "Aero Shake", "Aero Snap", "Aero Peek", "Calculator" and "Paint"
* A Few Other Mods...
So here we start our transformation tour:
1. Windows Theme or Visual Style: |
Windows 7 provides a new refreshing look which includes redesigned taskbar and start menu, Windows Explorer and a few other small changes.
You can get the same look in Windows XP by using following theme:

Theme Download Link
How to Use :
1. Once you download the ZIP file, extract it. You'll get a folder "SevenVG RTM Theme for Windows XP".
2. In this folder, you'll get 5 more folders:
* Extra Common Tasks (This folder contains 2 extra shell styles: Bottom and Left dark blue.)
* Fonts (This folder contains Segoe UI fonts required for the theme. Run Fonts.exe file to install them.)
* Iconized Taskbar Hack (This folder contains registry script to enable Iconized taskbar in Windows XP.)
* Styler Toolbar (This folder contains "Styler" setup file and "SevenVG RTM" Styler skin. You can apply it to get Windows 7 look-like commandbar in Windows XP Explorer.)
* Theme (This folder contains the main theme. Run Theme.exe file to install it.)
3. Run "Theme.exe" file present in "Theme" folder and apply the theme using Desktop Properties.
4. Also make sure you have patched the "uxtheme.dll" file to be able to use 3rd party themes in Windows. If its not patched yet, download and run UXtheme Patcher using following links:
Since Windows XP SP3 Final version has been released, most of the people are using it in their systems. If you are also using SP3 in Windows XP and unable to use 3rd party themes, then download this new UXtheme Patcher:
Download Windows XP SP3 UXtheme Patcher
Run the EXE file and click on "Patch" button. It'll take a few seconds and then you can restart your system to take effect.
This patcher works in SP3 RTM version only. If you are using SP3 Beta or RC version, then I'll advise you to not use this patcher. You can download the required patched "UXtheme.dll" file from following link and then copy it to "%windir%\System32" folder using "Replacer":
Download Patched UXtheme.dll File for XP SP3
Download Patched UXtheme.dll File for XP SP2
2. Icon: |
You can get Windows 7 icons in XP using "SevenVG Icon Pack":
Download SevenVG IconTweaker Pack
More Info
After downloading the file, extract it and you'll get a folder containing the Icon Pack. You'll need "IconTweaker" to apply this icon pack which is free and included in the ZIP file.
First install "IconTweaker", then double-click on "SevenVG Icon Theme.itt" file. It'll open IconTweaker window, click on "Apply" button to apply the new icons.
3. Boot Screen: |
Windows 7 contains a new animated boot screen which shows animated items/balls that come together to form Windows logo.
You can get a similar boot screen in Windows XP:

You can download the boot screens using following links:
Download Windows 7 Beta Boot Screen for Windows XP
Download Windows 7 Beta Boot Screen for Windows Vista
You'll need "Tuneup Utilities" to apply these boot screens.
NOTE: The above boot screens are not animated.
4. Login Screen or Welcome Screen: |
Windows 7 login screen looks similar to Vista login screen except the new background image and the text displayed at bottom.

You can download it using following link:
Download Windows 7 RC Login Screen for XP
More Info
After downloading, extract the ZIP file using WinZip, WinRAR or 7-zip and look for the "LogonUI.exe" file. That's the file which contains the login screen. You'll need to replace existing "logonui.exe" file present in "%windir%\System32" folder with this downloaded one. Use "Replacer" to replace the file which you can find in our "Downloads" section.
You can also use Tuneup Utilities to easily apply the login screen which is very safe.
0 Comments:
Post a Comment